Do you want to know how JioFi.local.html works? Well, it is a local IP address that is used for accessing the admin settings page of JioFi routers.

Reliance Digital has come up with a new network called Jio and took the Indian telecom industry by storm. Along with the SIM, they have launched JioFi, a WiFi hotspot device as well. By now, the company has brought two different variants (JioFi 2 and JioFi 3) of the hotspot device.
Contents
How to Login to Jiofi.Local.Html (Jiofi)
If you want to change your JioFi device’s default credentials, you have to log in to your Jio router admin dashboard. You can do this by going to Jiofi.Local.Html and entering the username and password for your device.
Time needed: 5 minutes
Well, let me guide you through the step-by-step guide on how to log in to your JioFi 2/3 device’s admin dashboard.
- Open a browser
Open Firefox browser and enter jiofi.local.html. Now press Enter to load the Jiofi page.
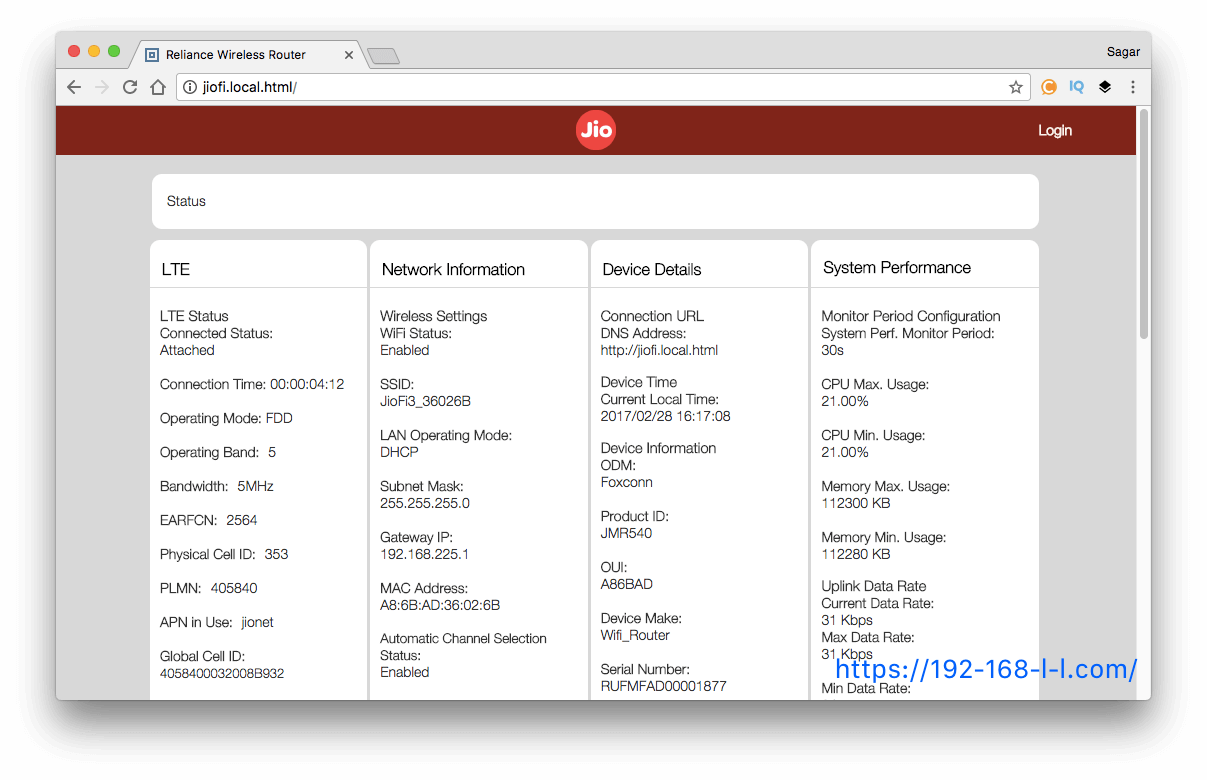
- Check the details of your device
Now, you will see the status screen with some details like how much internet speed you are getting and your device’s condition.
- Go to log in
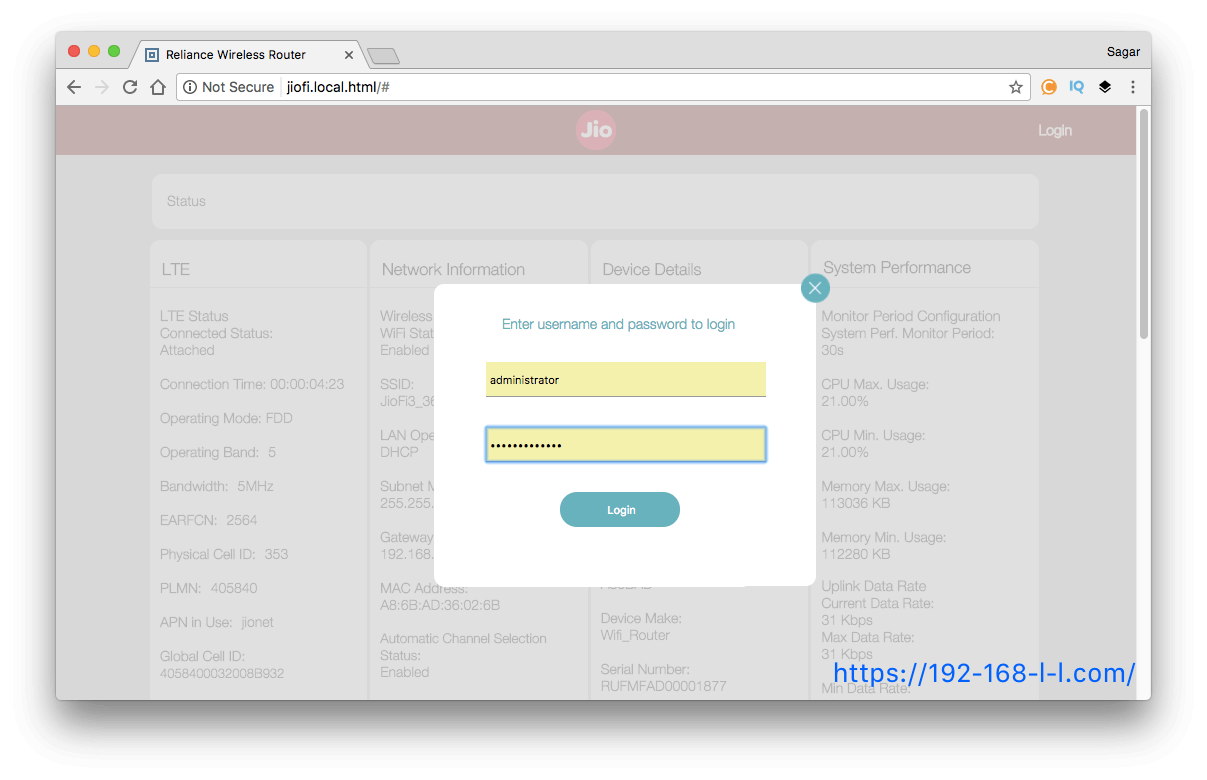
Next, you will see a button saying “Login,” click on that on the top-right-hand side. It will now redirect you to the Jiofi local homepage.
- Type in your credentials
Now, it will ask you for your username and password. Just enter the following username and password in those fields.
Username: administrator
Password: administrator - See content of admin dashboard
After typing the username and password, press Enter, and now you will be inside your JioFi’s admin dashboard. At this moment, you have successfully logged into your JioFi admin page.
Change Password of Your JioFi Device
- First, you have to open your web browser.
- On your web browser, type in the jiofi.local.html and press Enter.
- Now, on the login page, enter the default username and password.
- As in the case of a normal router, the default credentials of JioFi are administrator, administrator. Type those into the given field.
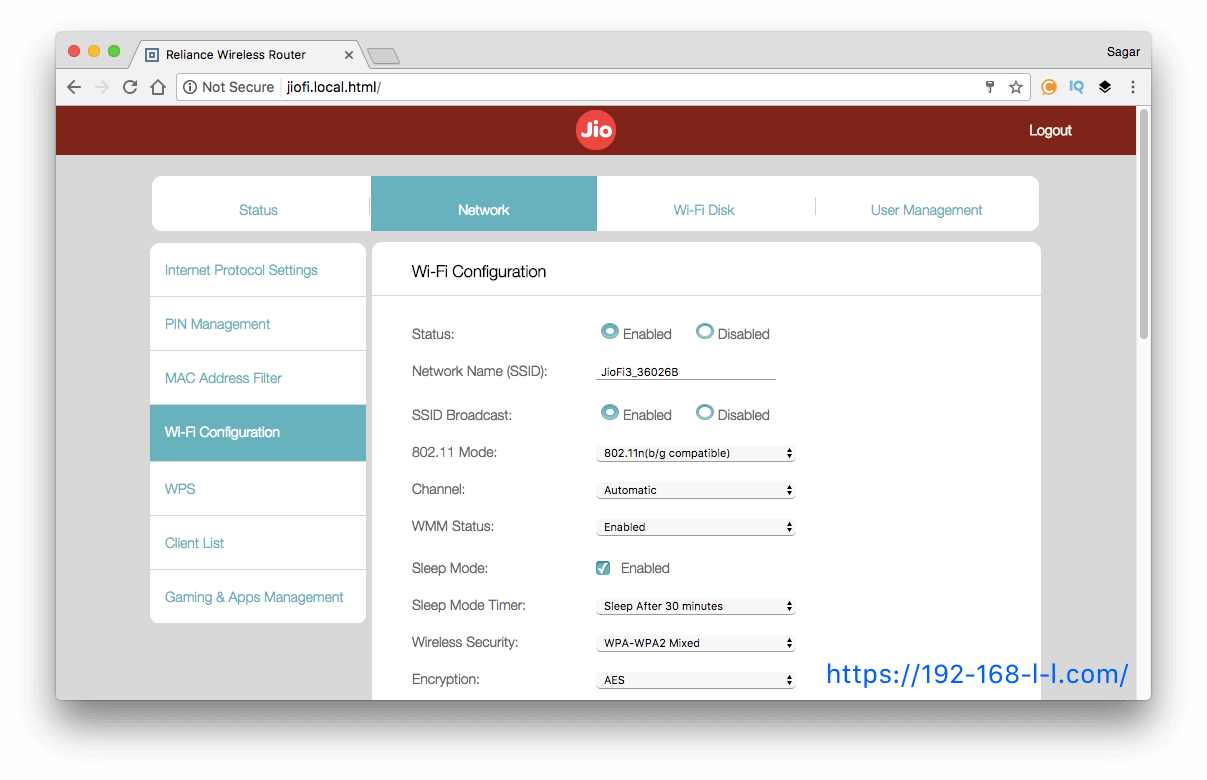
- You can see the configuration screen of your JioFi device now. We are going to change the WiFi password of your device. Click on Settings from the screen you see now.
- On the window that comes at this step, you will see a tab named WiFi settings. Click on it.
- You get three options here; SSID name, WiFi password, and the mode of the channel. Change whatever you want and hit the Save button.
That’s it. Now no one can use your JioFi WiFi network using the old password. If you happen to change the username and password before this, you will need to reset your router to change it back to factory settings. In which, you can use the administration for username and administration for the password. Or it could be admin and admin.
What Is jiofi.local.html?
Let me ask you one thing. What is 192.168.1.1?
It is the IP address of many routers. Once you enter the IP address on your browser, you will be asked to provide the username and the password—most of the time, it’s admin and admin.
After providing the correct username and password, you will have many options to configure the router. You can change the password, monitor the devices connected to your network, and a lot more.
Simply put, jiofi.local.html to JioFi is what 192.168.1.1 or 192.168.0.1 is to your router. Yes, you can use this IP address to configure the settings of your JioFi hotspot device.
What Else Can Be Done with JioFi.Local.Html?
In order to access your JioFi (jiofi.local.html) admin page, you will need to type in jiofi.local.html or 192.168.1.1 on your browser’s address bar. Once you gain access to your router admin panel you can adjust its settings.
This will involve several options regarding password, WiFi Network name, IP QoS, DNS, Proxy, LAN, WAN, network management, security options, WLAN settings, PPPoE, MAC, WPS, DSL, and DHCP client.
Important: JioFi (jiofi.local.html) is really a low-end router. You should check these Best Gaming Routers for 2019 for better online performance. Or, if you are looking for a good list of router options, check out these best wireless routers instead.
Check How Many Devices Are Connected To JioFi
JioFi 2 and JioFi 3, both of the devices, allow 32 simultaneous connections. Yes, you should keep track of the connected devices whenever you feel the network is slow.
So how do you do it? Just follow the step-by-step guide below to learn how to do that.
- Access the wifi configuration page by entering 192.168.1.1 into the address bar of your browser. Don’t forget to connect to the wifi network first.
- Enter the username and password. You know the default credentials, don’t you?
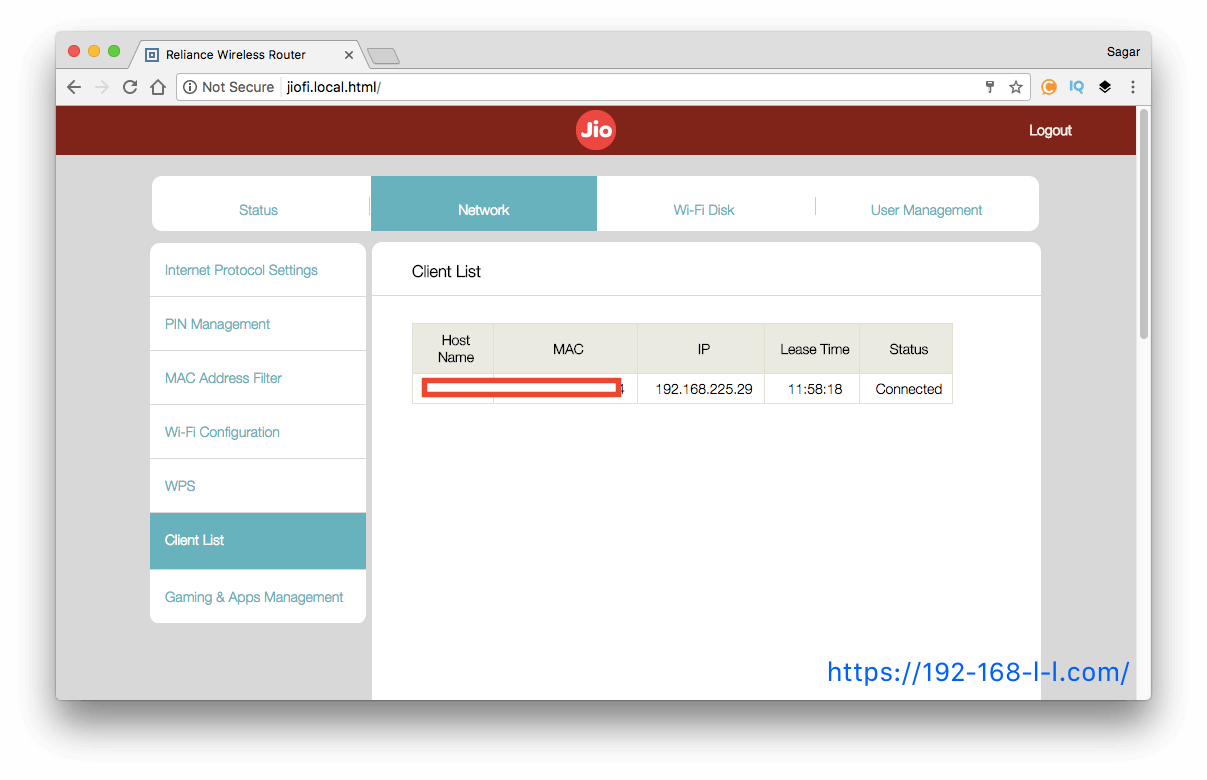
- You will get a tab named “Network.” Don’t hesitate to click on it.
- Scroll down a bit to see the LAN client list; once you find the link called “Client List,” click on it. You can see all the details (Name, IP, Mac Address, Leased Time, and Status) of connected devices there.
How To Reset Jiofi
In this era of rapid technological advancements and digital connectivity, it has become almost impossible to imagine a day without the internet. And with the increased reliance on the internet for everyday tasks, having a stable and high-speed network has become a necessity. JioFi, a portable WiFi hotspot device offered by Jio, has emerged as a popular choice for millions of users in India who seek reliable wireless internet connectivity.
However, like any other electronic device, JioFi too can face occasional glitches or performance issues. In such cases, the simple act of resetting your JioFi device can work wonders and get it back up and running smoothly. Whether you’re experiencing slow internet speeds, facing problems with device connectivity, or are unable to access certain websites, resetting your JioFi is often the go-to solution.
So, how does one reset a JioFi device? Well, the process is remarkably straightforward and hassle-free. Here are a few generic steps that will help you in resetting your JioFi device effortlessly:
1. Locate the Reset button: Every JioFi device has a small, usually red-colored, reset button that is discreetly placed on the device. It is usually located inside a tiny hole or around the back panel. Take a close look at your JioFi device to identify this button.
2. Soft Reset: First things first, you can try a soft reset of your JioFi. With the device switched on, gently insert a pin or a paperclip into the reset button hole. Press and hold the button for a few seconds until you see the device’s lights start to blink. This soft reset will allow your JioFi to refresh its settings without deleting any saved data or WiFi credentials.
3. Hard Reset: If the soft reset fails to resolve the problem, and you want to completely restore your JioFi device to its factory settings, a hard reset is the way to go. Ensure that your JioFi is powered on and connected to a charging source. Once again, use a pin or a paperclip to press and hold the reset button for approximately 20-30 seconds. You should now see all the LED lights on your JioFi flash simultaneously. Release the button and wait for your device to restart.
4. Reconfigure and troubleshoot: After performing a hard reset, it is essential to reconfigure your JioFi device to establish an internet connection. Connect your smartphone, tablet, or laptop to the reset JioFi and open your internet browser. You will be redirected to the login page where you can create a new password and set up your WiFi network. Follow the on-screen instructions, and if required, contact the customer support helpline for further troubleshooting assistance.
In conclusion, when faced with any setbacks regarding your JioFi device, resetting it can often be the key to solving the problem. It is a simple and easy process that ensures smooth functioning and uninterrupted internet connectivity. Always remember to back up your data, retrieve any essential information, and follow the prescribed steps provided by Jio before initiating the reset process. By doing so, you can experience the transformation and efficiency that resetting your JioFi offers.
F.A.Qs
1. Open the Firefox browser and enter jiofi.local.html. Now press Enter to load the Jiofi page.
2. Now, you will see the status screen with some details like how much internet speed you are getting and the condition of your device.
3. Next, on the top-right side, you will see a button saying “Login,” click on that. It will now redirect you to the Jiofi local homepage
4. Now, it will ask you for your username and password. Just enter the following username and password in those fields.
Username: administrator
Password: administrator
5. After typing the username and password. Press Enter, and now you will be inside your JioFi’s admin dashboard. At this moment, you have successfully logged into your JioFi admin page.
It is the IP address of many routers. Once you enter the IP address on your browser, you will be asked to provide the username and the password. Most of the time, it’s admin and admin.
1. First, you have to open your web browser.
2. On your web browser, type in the jiofi.local.html and press Enter.
3. Now, on the login page, enter the default username and password.
4. As in the case of a normal router, the default credentials of JioFi are administrator, administrator. Type those into the given field.
5. You can see the configuration screen of your JioFi device now. We are going to change the WiFi password of your device. Click on Settings from the screen you see now.
6. On the window that comes at this step, you will see a tab named WiFi settings. Click on it.
7. You get three options here; SSID name, WiFi password, and the channel’s mode. Change whatever you want and hit the Save button.
Conclusion
Do you have any more doubts about it or your jiofi device? Or do you face any issues while you try to access or loginjiofi.local.html? I hope the above simple steps and content helped you.
Don’t hesitate to scribble down your issues or message about jiofi.local.html or the above-mentioned steps into the comments section down below. Moreover, I appreciate it if you share this with your friends and followers on social media.